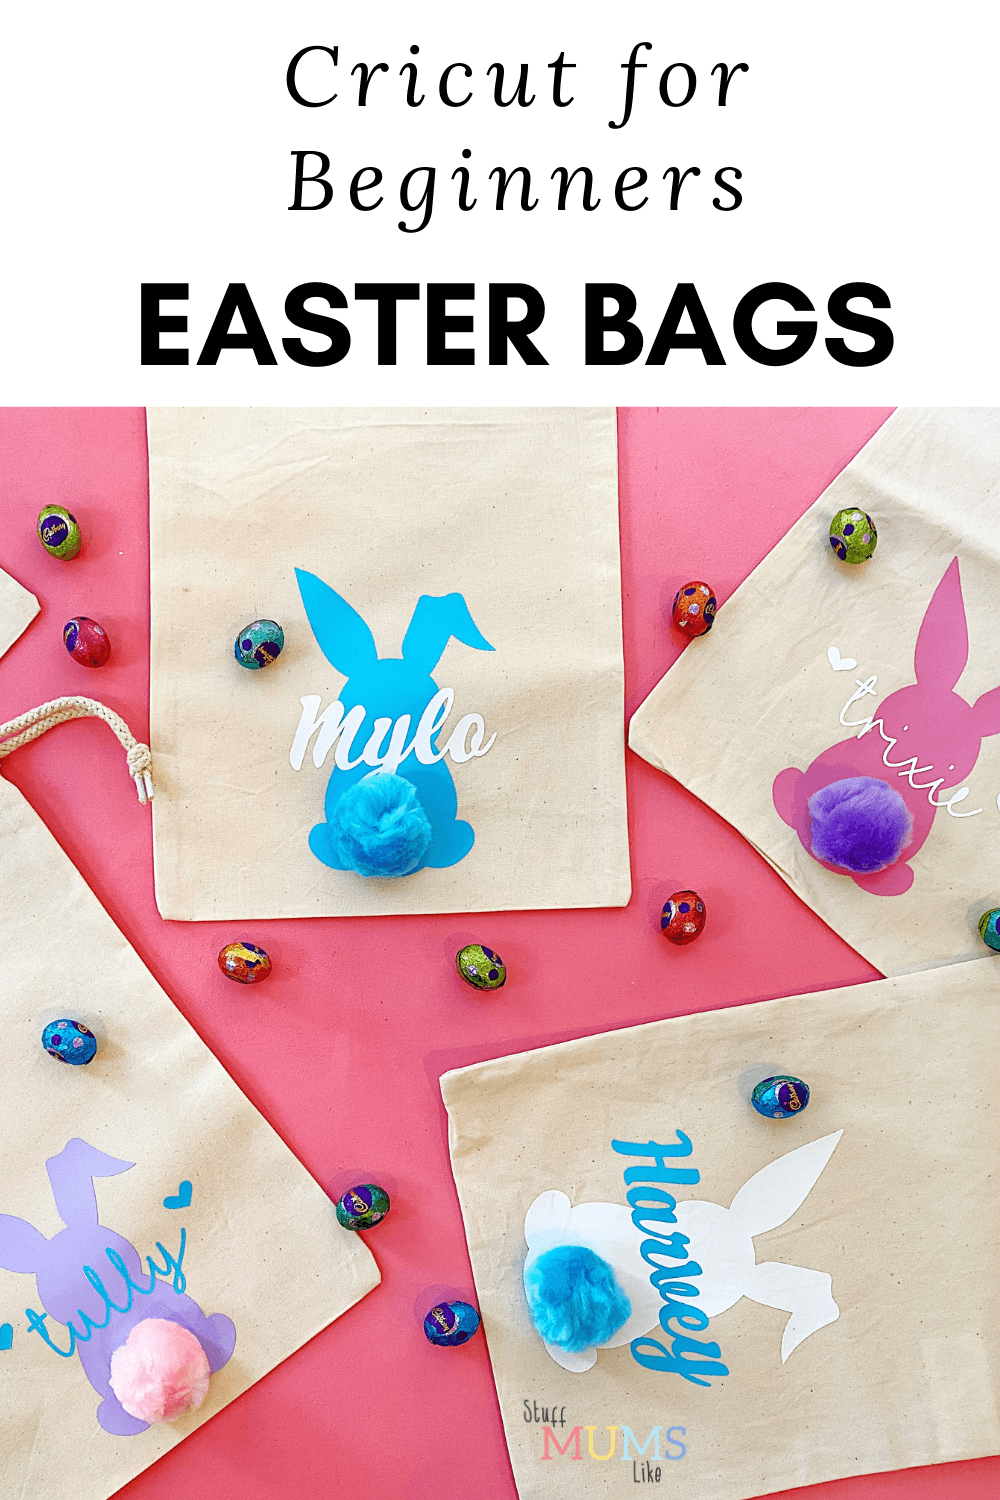
Hello! I've been playing with my Cricut. I've even been taking classes at Spotlight (well until they were postponed along with everything else). One of my favourite projects is these Easter bags I made for all the kids we camp with every year. This Cricut for Beginners project is almost as simple as the library bags we made before, but with an extra layer of vinyl.

Contents
Cricut for Beginners - Easter Bags
You will need:
Drawstring calico bags (you can get them at Spotlight)
Iron on vinyl in at least two colours
Craft pom poms
Tape measure/Ruler
Hot glue gun
Cricut for Beginners - Directions
Download an Easter Bunny SVG file template from Etsy. I used this one, it cost me $3.36. If you don't really understand what you are looking for just search Easter Bunny SVG file and it will search for you. SVG is the type of file you can use on design space.
Open Design Space and then create a new project. On the lefthand tool bar you'll see the upload button.
Upload your image

You can drag and drop your SVG file and it will appear as an uploaded image.

Select your image and then choose insert image.
Once you have your image on your screen, check it's current size. Then, use a tape measure or ruler to measure the size of your and decide on the size you want your rabbit. Use the corner arrows to adjust the height and width.

Adjust the Size
Once you have the size then, if you are making more than one you can duplicate the image and size on the canvas with a simple cut and paste.
As I was making several I cut out the bunnies and the names in the same colours and then alternated the colours and the bunnies, as I did pink, purple, blue and white.
However - if you want to only do one or two bags then, design the bunny shape and the name on the same board, but then select the name and change its colour using the colour change option at the top when you highlight the text.

Format it Correctly
Changing the colour of the name on the board means that you are telling Design Space that you are wanting to cut this part of a design on a separate mat so you can cut a different coloured vinyl. It doesn't matter what colour you select, it just works to divide the project.
So, after you have your bunny sized, write your name. In my project I downloaded the font I Love Glitter for free and uploaded it, but it's quite complicated if you are new to Cricut and there are loads of options on your Cricut, especially if you sign up to their subscription service.
For the boy's bags I used Retro font which comes with the Cricut. You can either pay to use it individually or you get it as part of the monthly subscription service.
To size the name correctly, write it then drag it over the bunnie picture to see how it sits. You can choose the size you want, as long as you're happy with how it looks on top of the bunny silhouette.
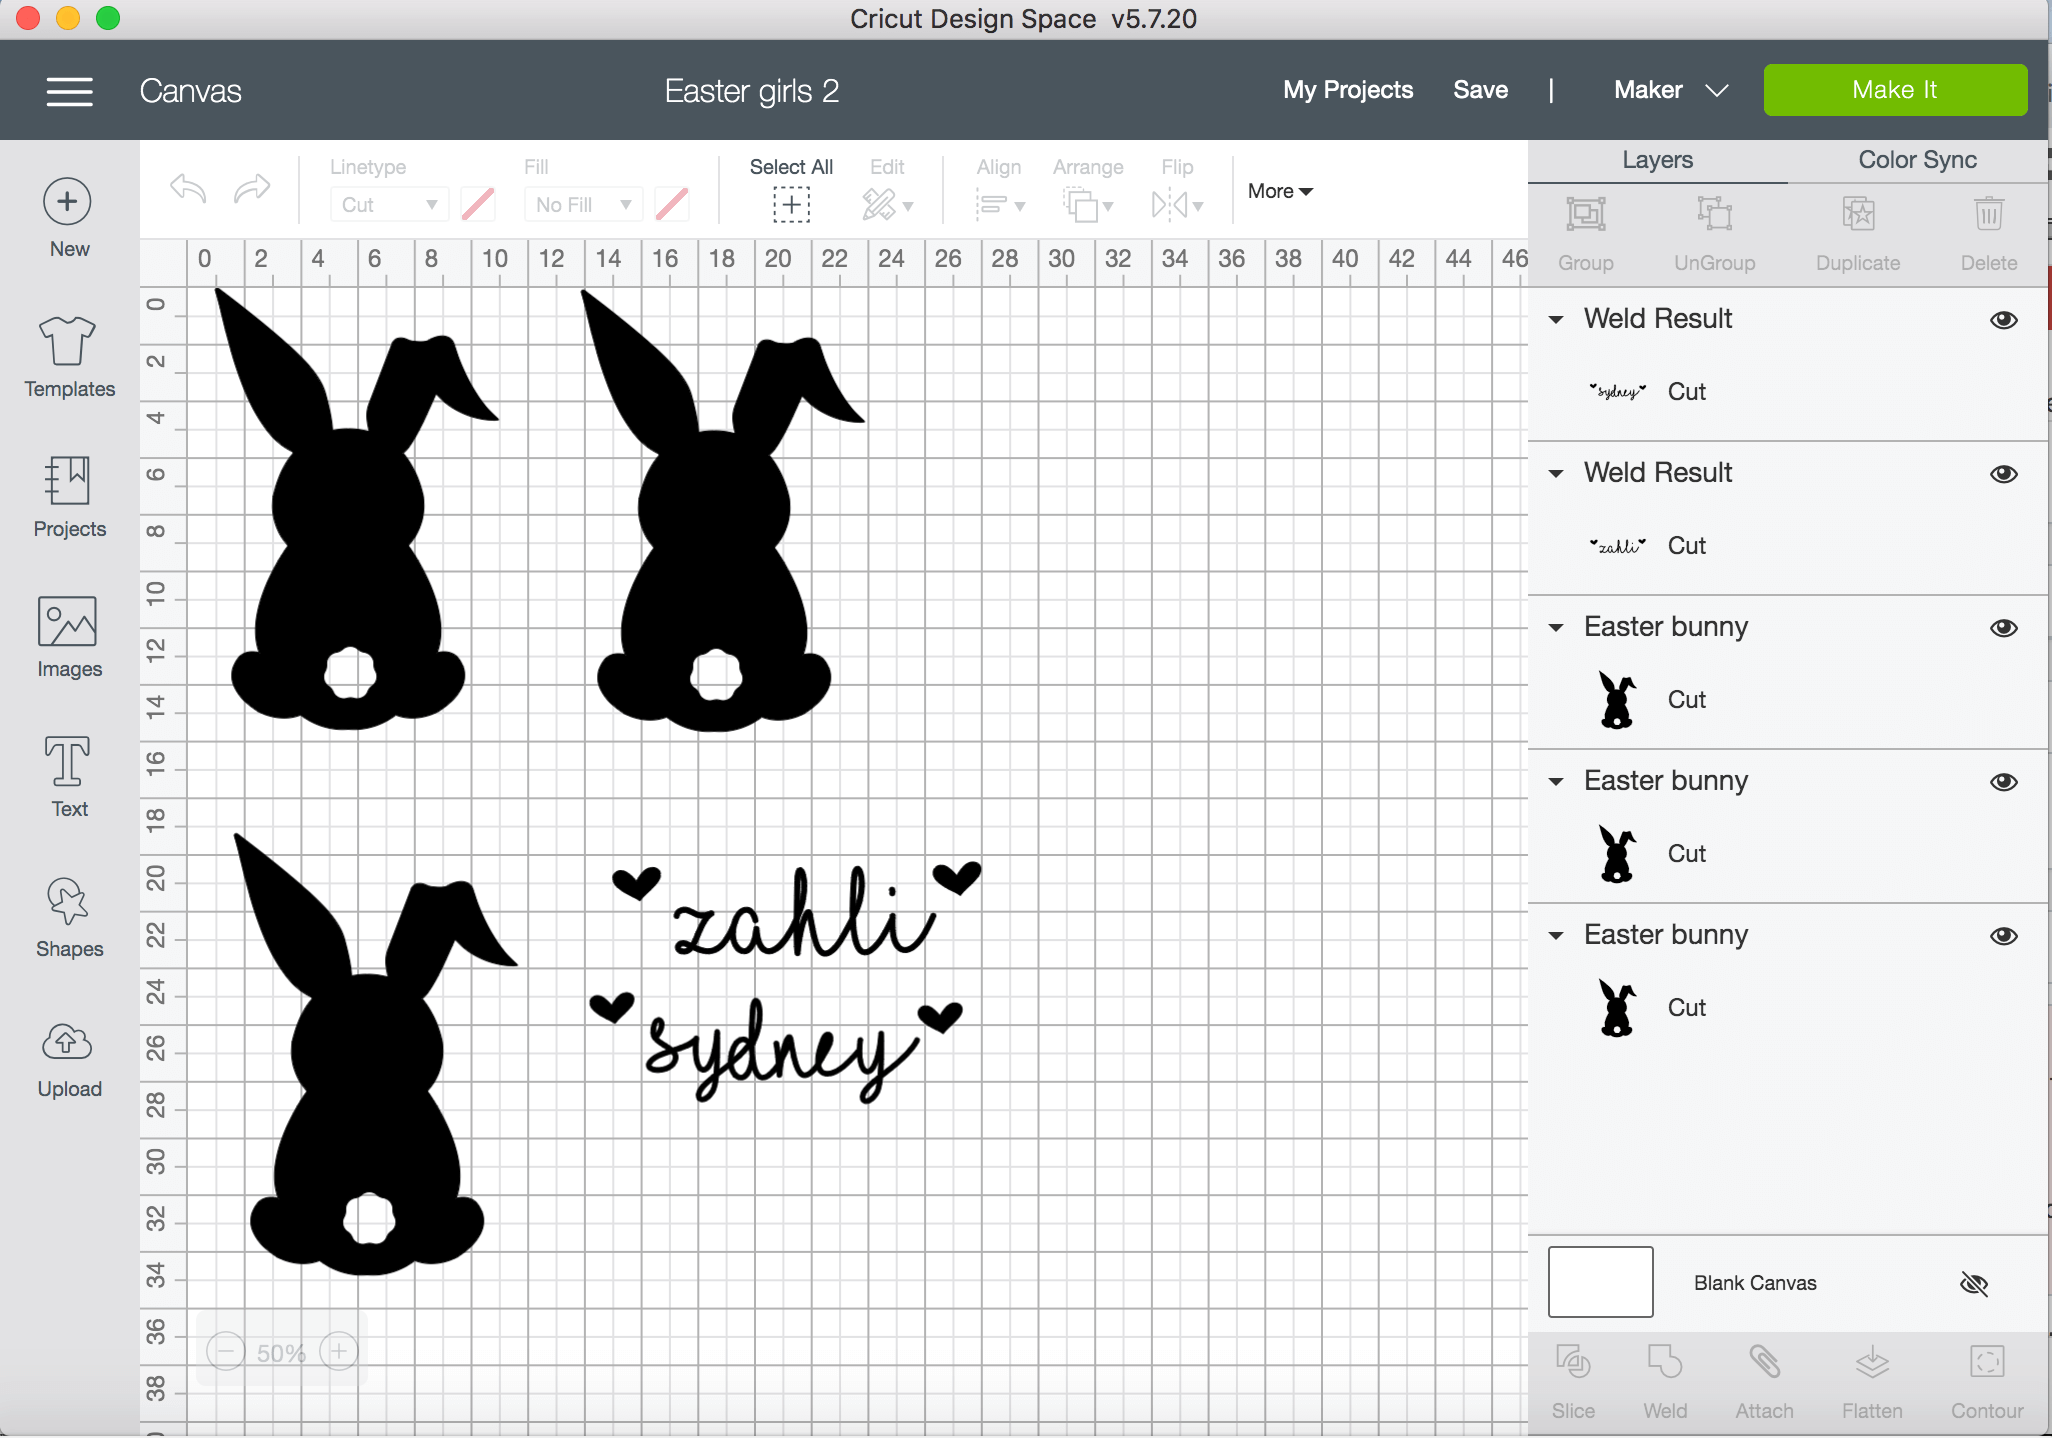
Once you have sized your bunnies and your text, click Make It in the bottom right hand corner. You'll get this screen...

The first board says '1' - that's the board where your bunnies will be cut from. So load up your mat with your iron on vinyl and make sure you put the SHINY SIDE DOWN! Then, see that little toggle underneath on the screen where mat 1 is that says 'Mirror'? Click it over so the image is mirrored. Whenever you use iron on vinyl you MUST mirror everything before you cut or it will be backwards.
Select your material and iron on vinyl and then cut!
Once you cut the first mat then it will ask for your second mat, so load up the colour vinyl (shiny side down) that you want, make sure the writing is mirrored and then cut again.
Now you have all your pieces and we are going to use the EasyPress!
Cricut for Beginners - EasyPress Directions
Ok - so now you have your designs. You need to trim around the outside of them (careful not to lose bits, especially from your writing) and weed them. Once your design is ready and weeded heat your EasyPress to 190 degrees and place your bag on the EasyPress Mat.

Once your EasyPress is heated, place it on the bag for 15 seconds then remove. This gives you a nice, flat surface. Next, place your bunny on the fabric, making sure your shiny side is up, so that the vinyl is making contact with the fabric and you have the plastic sheeting at the top.
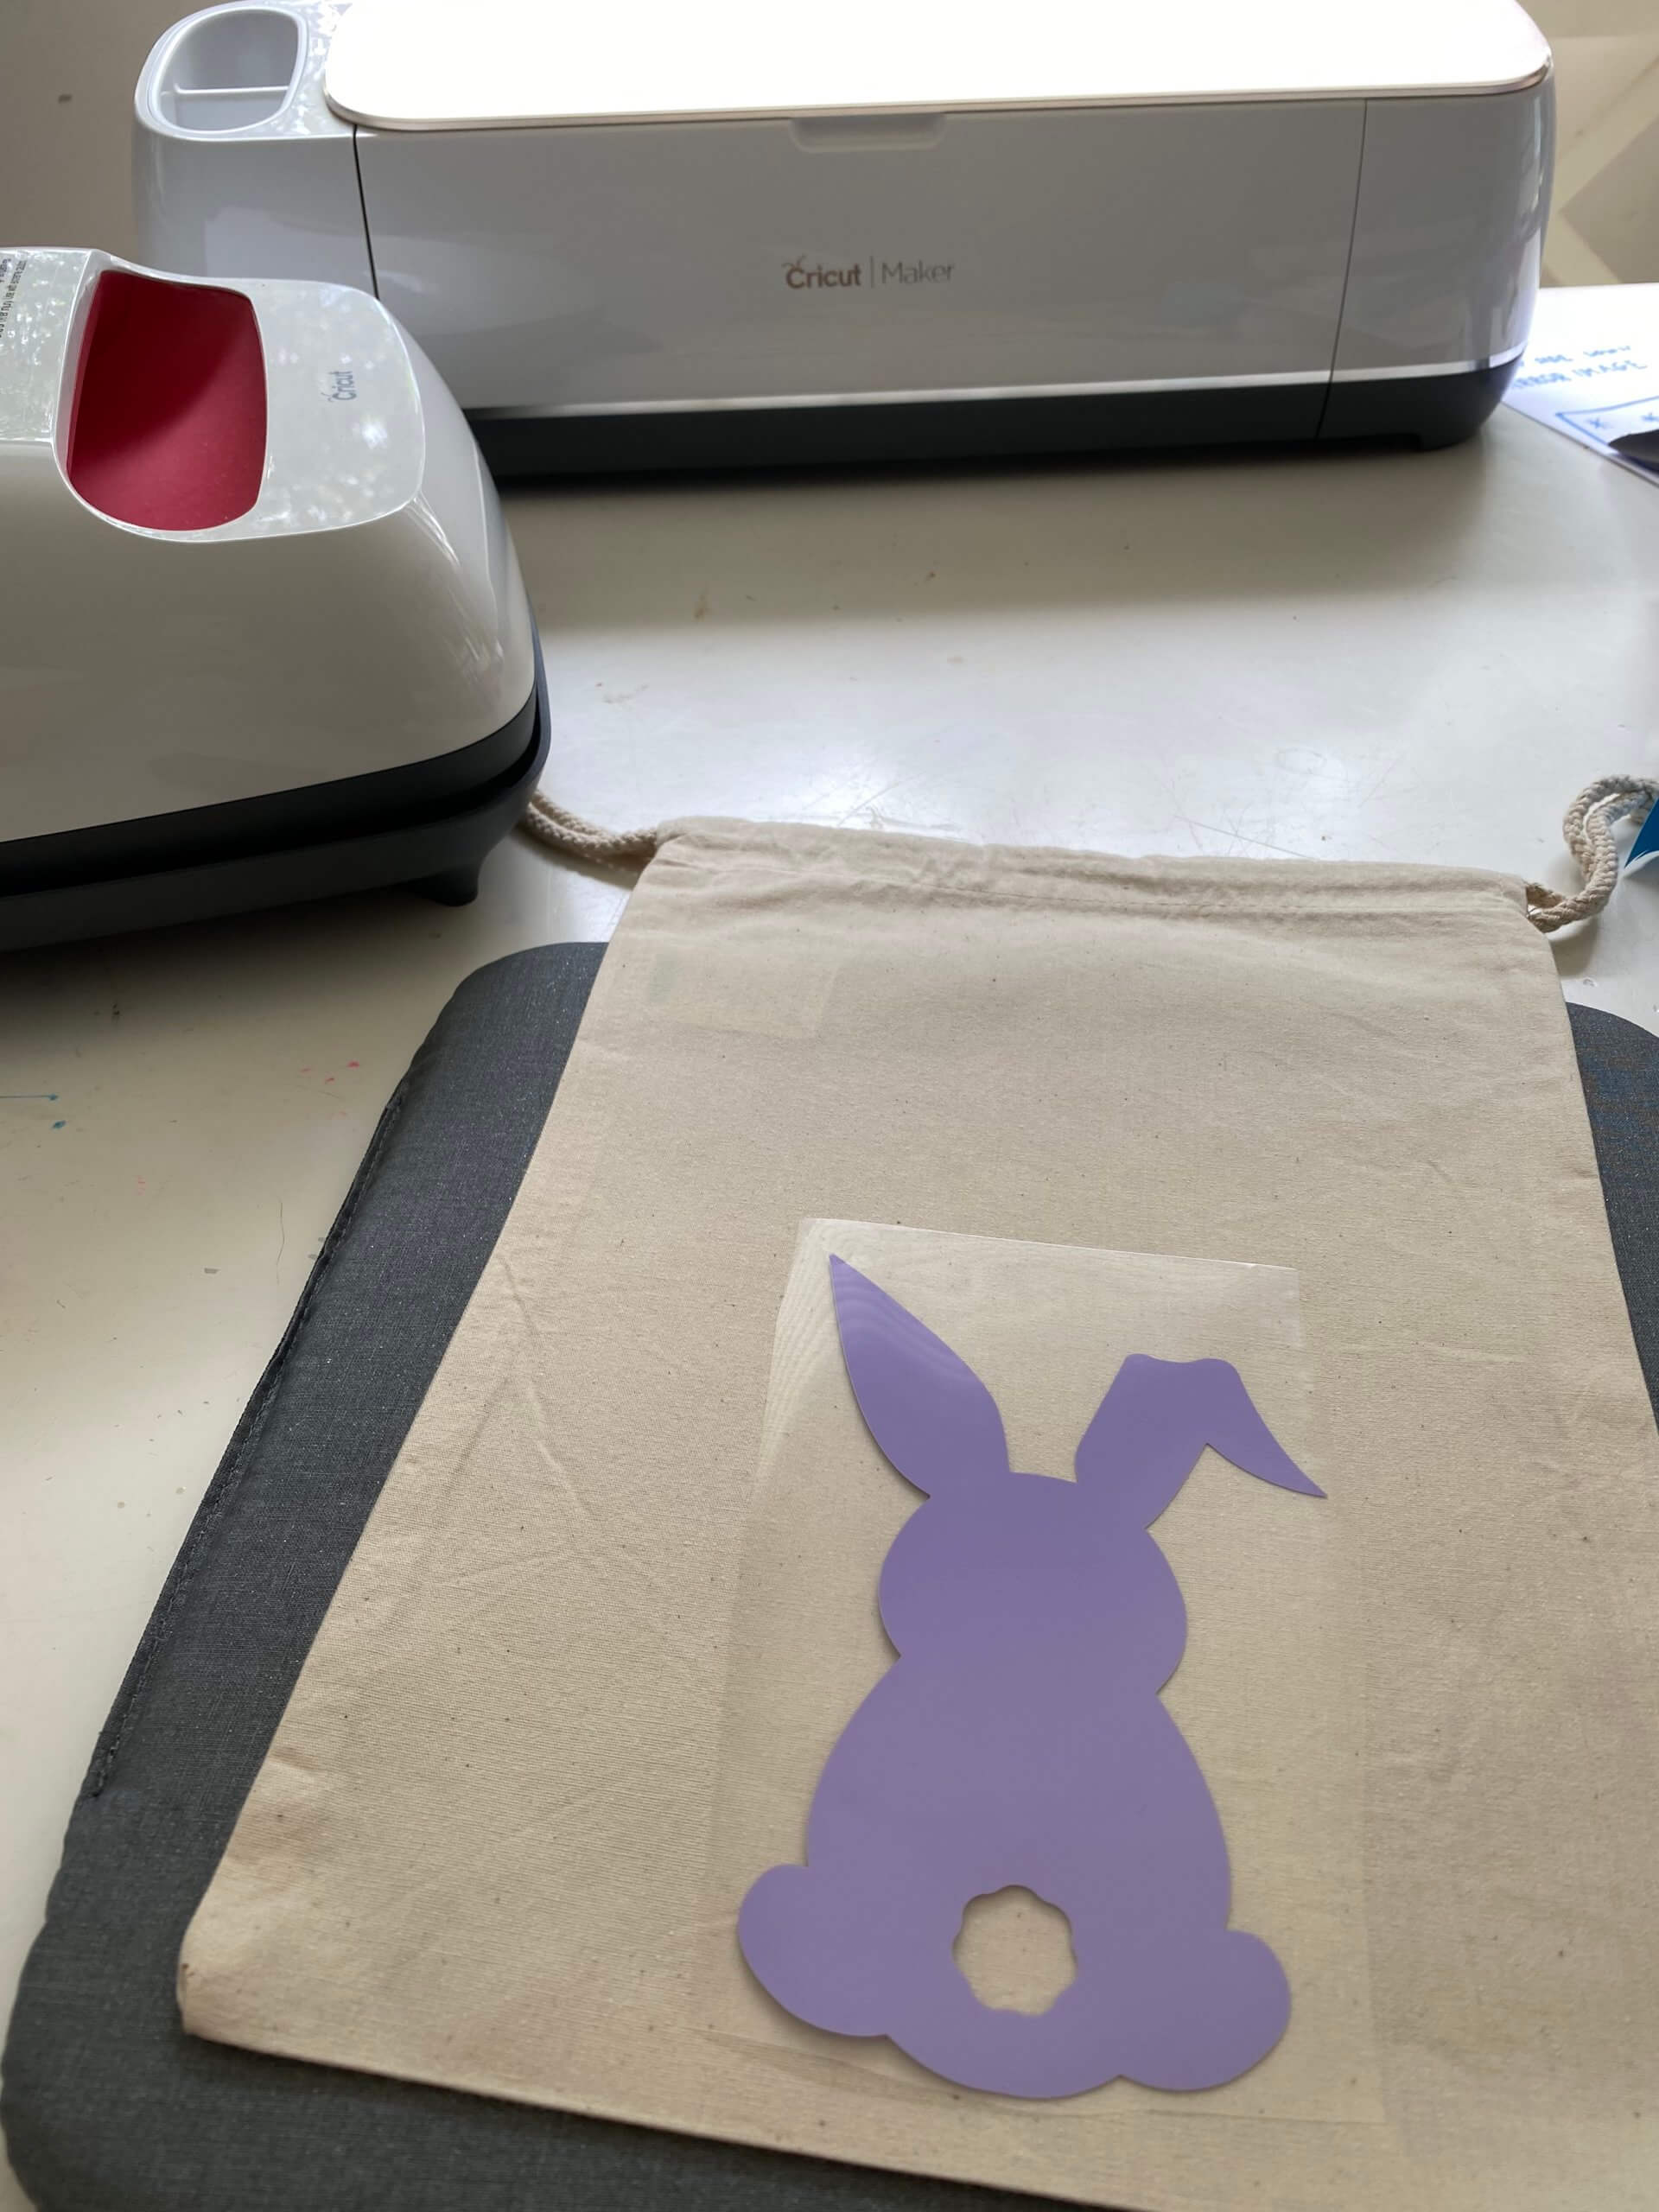
Place it where you want it to be and then cover it with an old pillow case or a piece of baking paper and hold the EasyPress on top for around 35 seconds. Then let the design cool before removing the backing. If the vinyl is still sticking to the backing, rather than the fabric, then re-press the edges.
Once you remove the backing of the bunny image, place the name over the top, shiny side up!
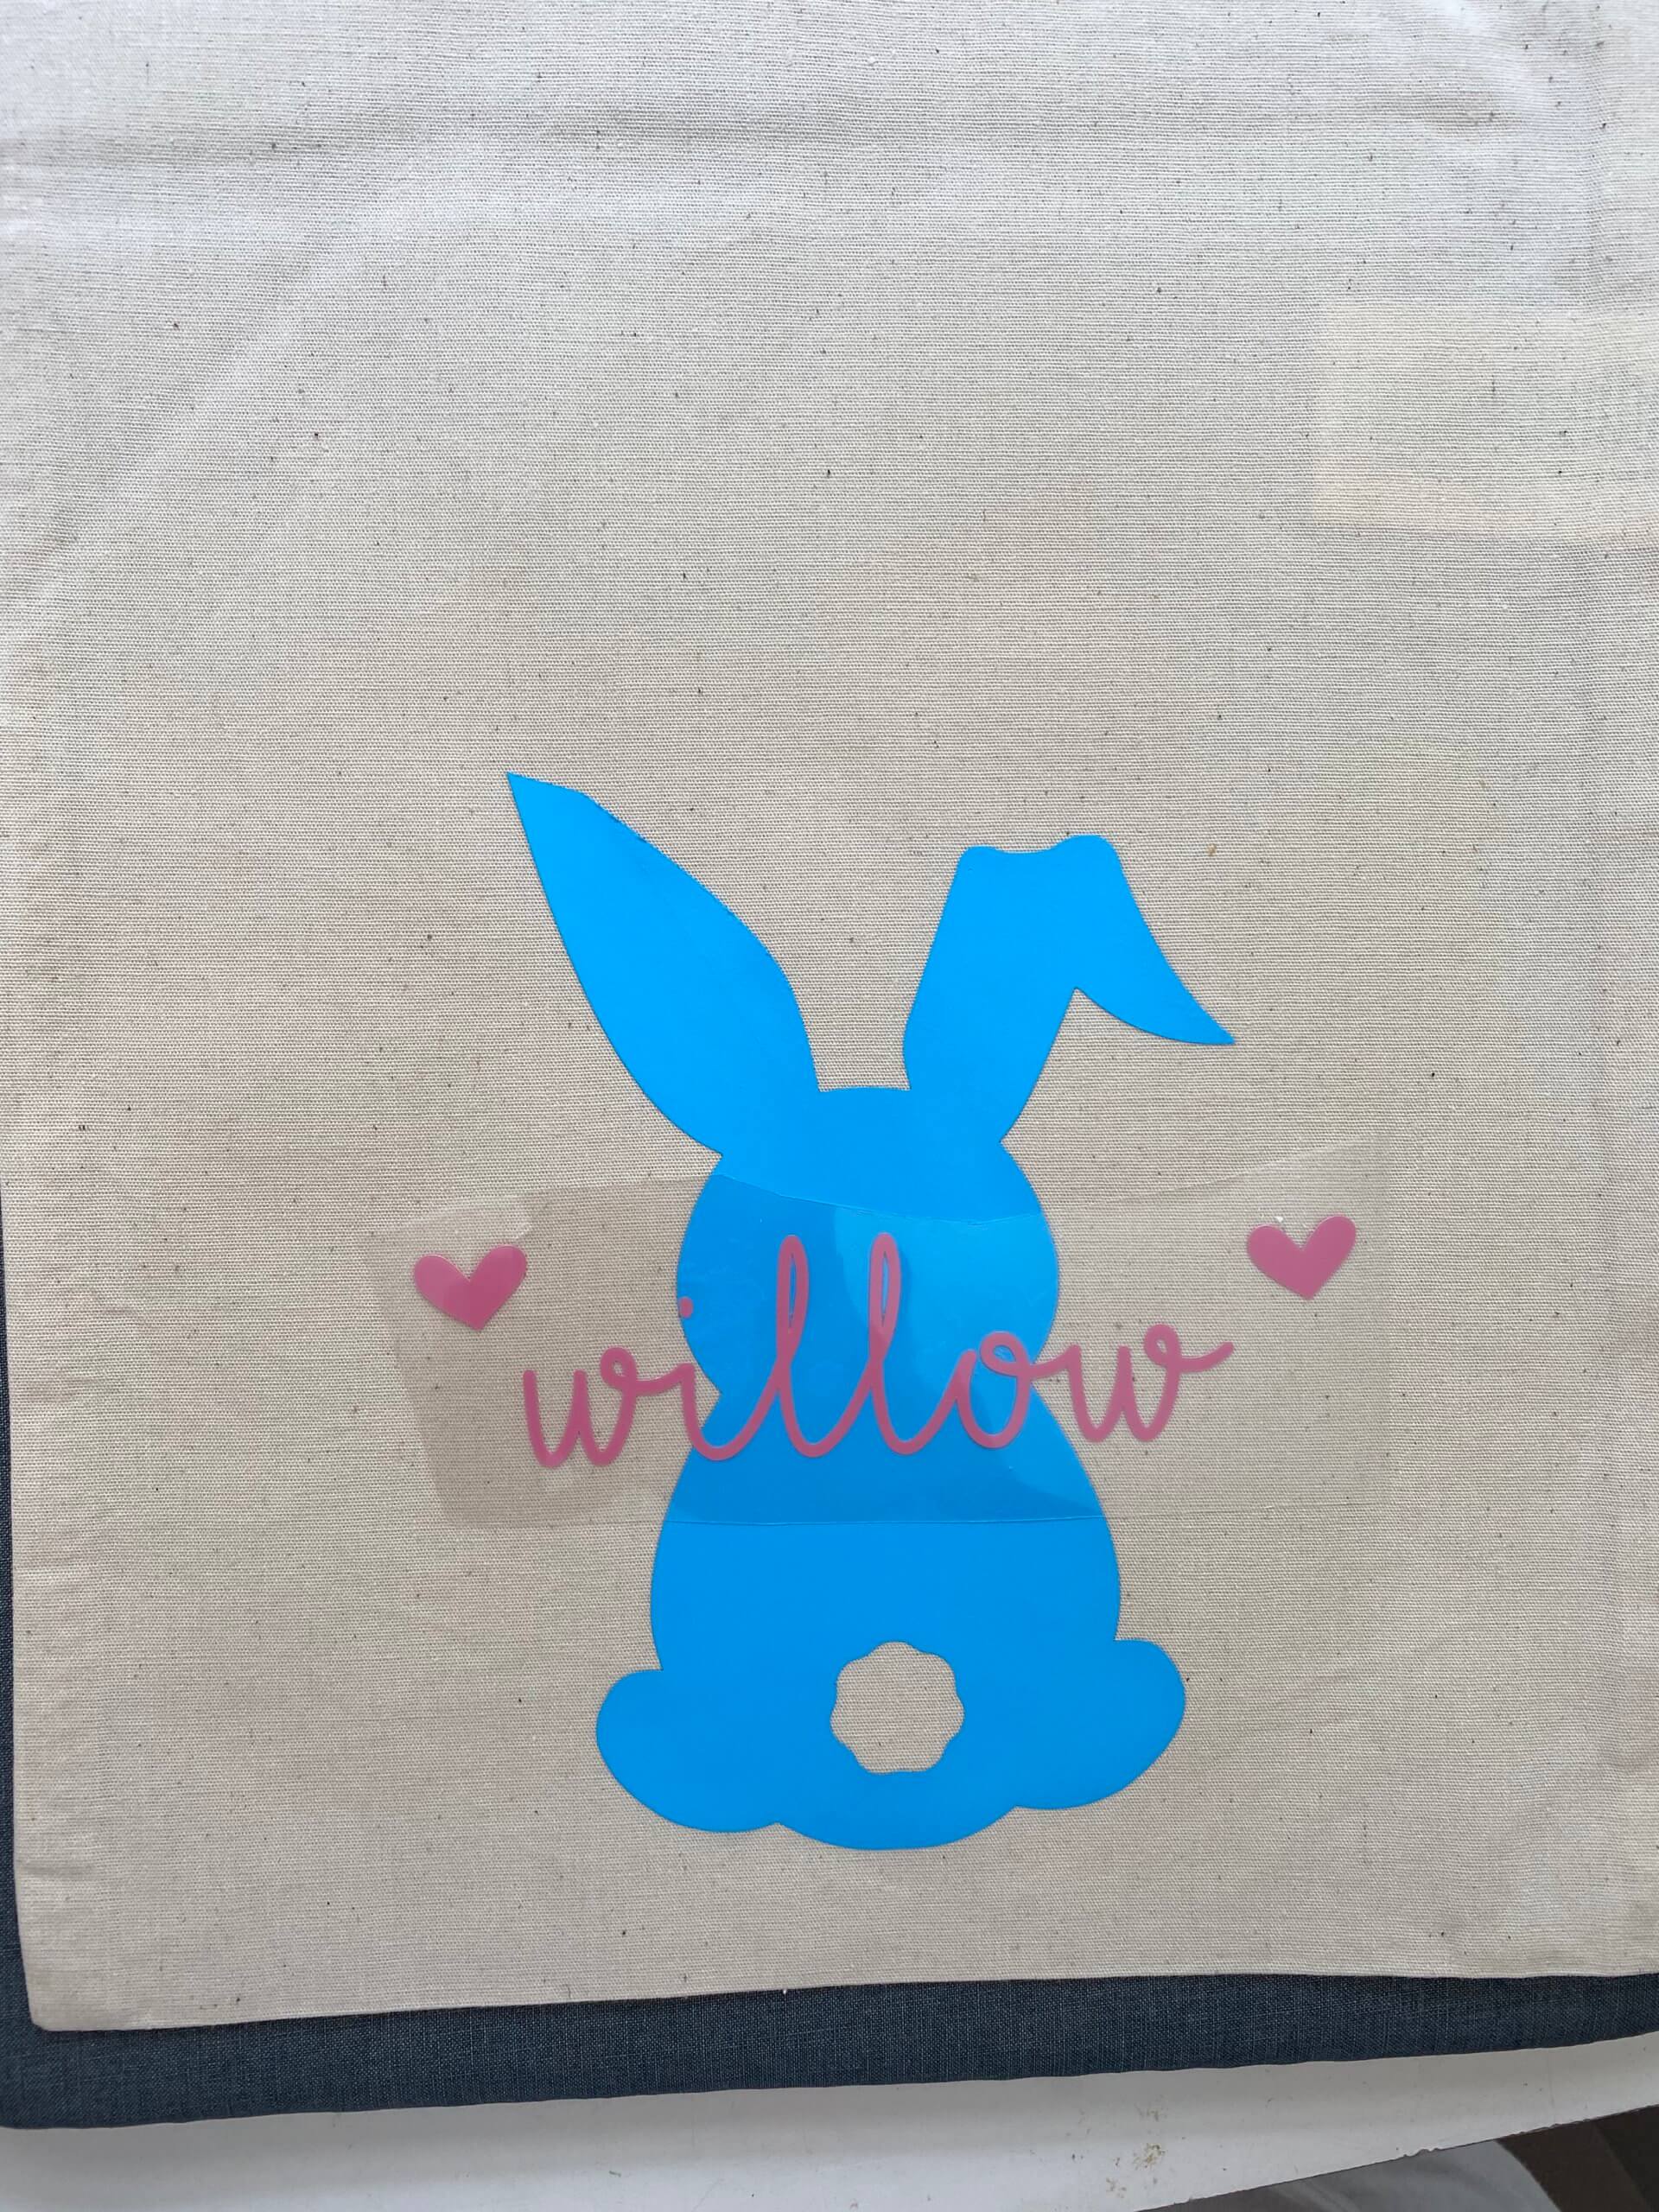
Repeat the EasyPress steps for the name and then remove backing when cool.
Now you're done! All you need to do is use your hot glue gun to attach the tail and you're ready to go!
Also, If you are looking for things to do while you're on lockdown head over to Spotlight for some downloadable activity sheets and more!
Let us know if you have any Cricut for Beginners projects you'd like to share in the comments.


Leave a Reply