
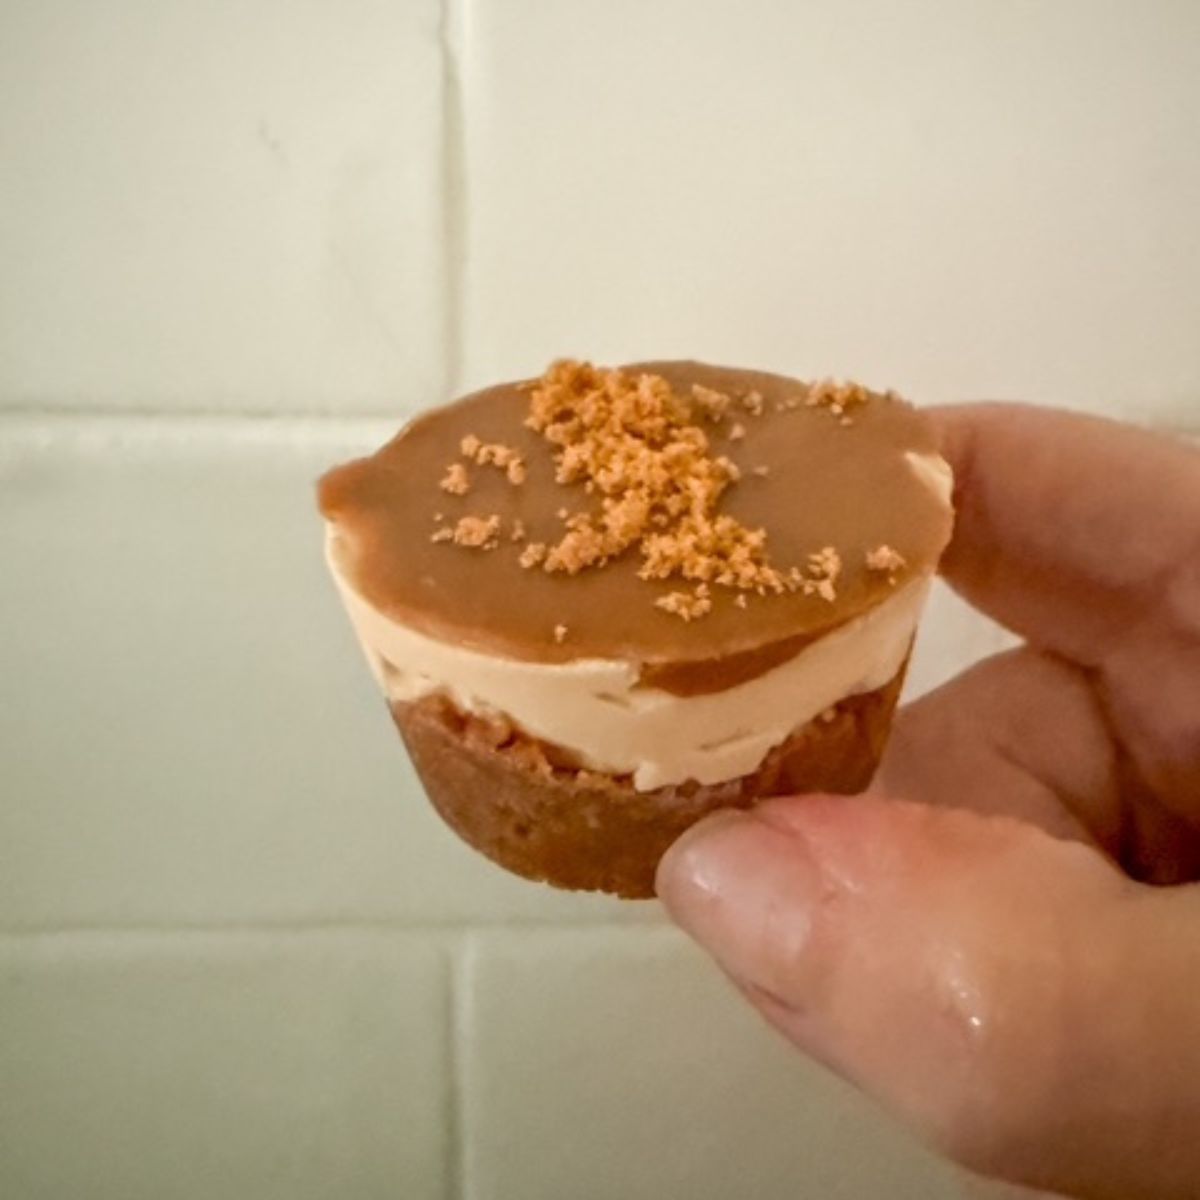
Have you made my viral Mini Biscoff Cheesecake Bites yet?
If not, this weekend is the perfect time to jump on the trend that mums (and dessert lovers everywhere) can't get enough of.
When I first posted this recipe on Facebook, I had no idea it would take off the way it did. But within hours, it had been saved, shared, and sent around more times than I could count. Safe to say, it went absolutely bananas - or should I say, Biscoff?
So, what is it about Biscoff that people love so much? It’s that one-of-a-kind flavour -like a spiced, caramel bikkie that gives you a warm hug. The spread version? Dangerous. It’s smooth, rich, and just sweet enough to feel indulgent without being too over the top. Whether you’re stirring it through a cheesecake, drizzling it over pancakes, or sneakily eating it straight from the jar (no judgement here), it never disappoints.
These mini Biscoff cheesecake bites are super easy to make and even easier to eat. They look like something straight out of a fancy café cabinet, but they come together with just a few simple ingredients and no oven required. Even better, you can make them ahead of time, keep them in the freezer, and pull them out for lunchboxes, playdates, or that 3pm sugar crash.
Contents
How to make your Biscoff cheesecake bites
Make the Biscoff cheesecake biscuit base
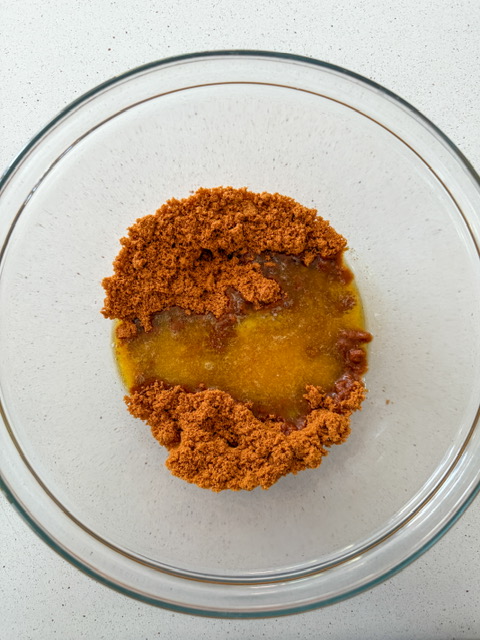
Add the Biscoff biscuits to a food processor or Thermomix and blitz until fine crumbs form.
Pour in melted butter and mix until fully combined.
(Tip: Set aside 1 tablespoon of crumbs to sprinkle on top later.)
Press into moulds
Spoon about 1 teaspoon of the biscuit mixture into each hole of a silicone mini muffin tray.
Press down firmly to form a solid base - use the back of a spoon or your fingers.
Mix the Biscoff cheesecake filling
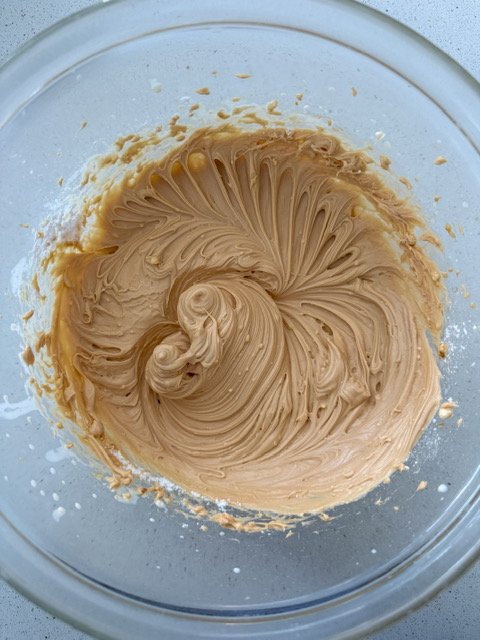
In a bowl, combine room-temperature cream cheese, thickened cream, icing sugar, and Biscoff spread. Beat until smooth and creamy.
Assemble the cheesecakes
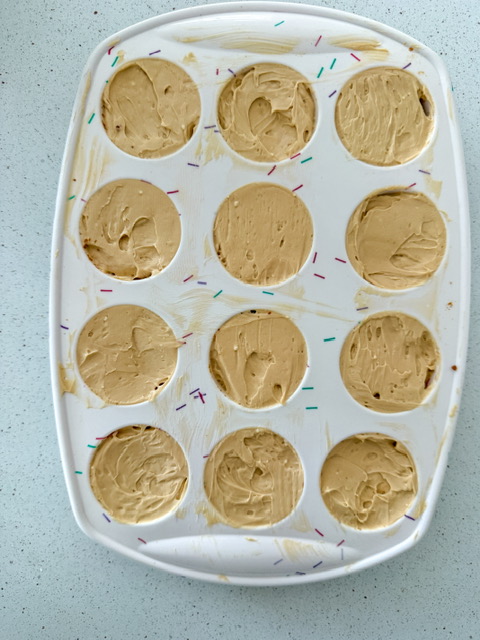
Spoon the cheesecake mixture over the biscuit bases, smoothing the tops with a knife or spatula.
Add the Biscoff topping
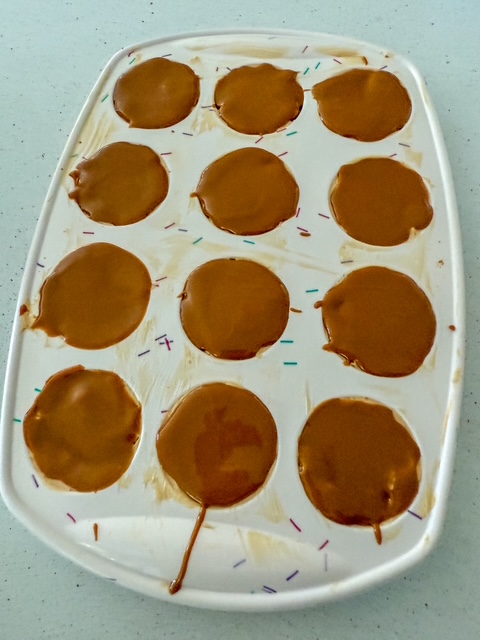
Melt Biscoff spread in the microwave (around 30 seconds). Drizzle or spoon a small amount on top of each cheesecake and swirl if you like.
Chill to set
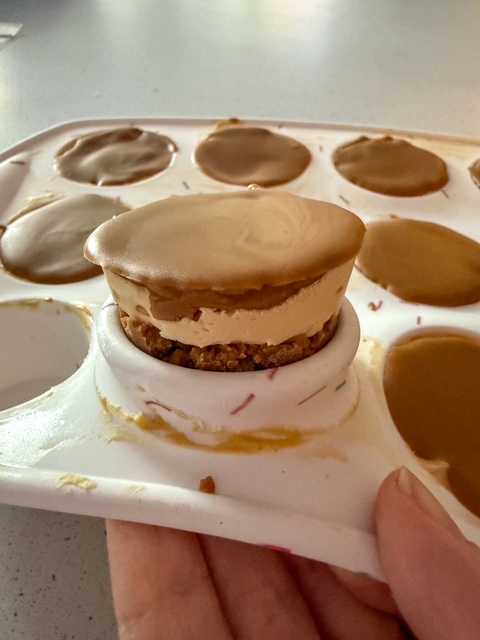
Place the tray in the freezer for at least 3 hours, or overnight if you prefer. (You can store them in the fridge after they’re set, but freezing helps them pop out of the moulds more easily.)
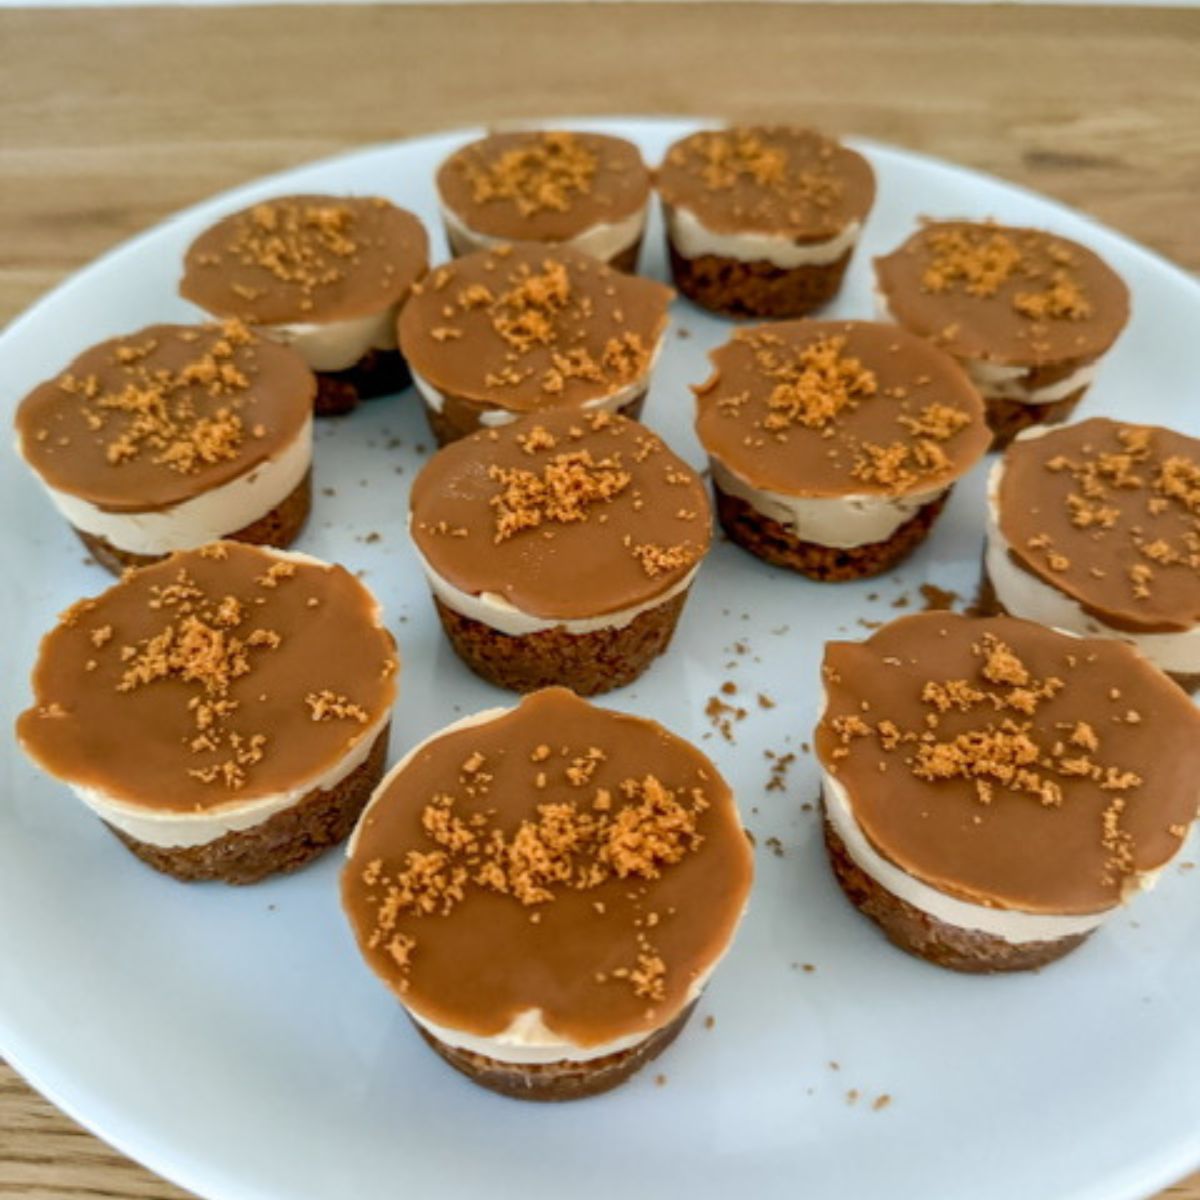
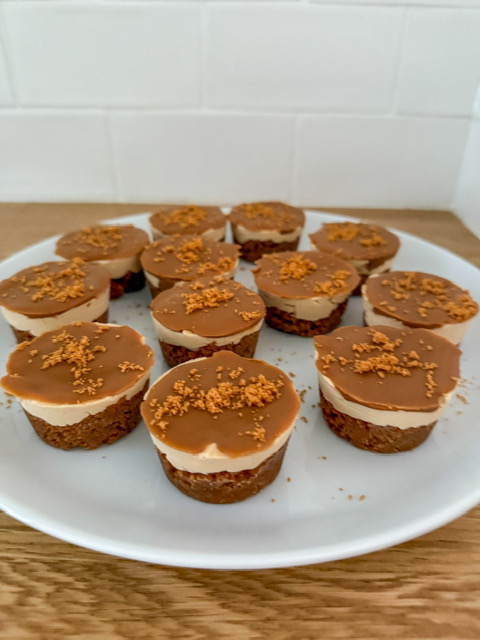
Once set, gently pop the cheesecakes out of the moulds. Sprinkle over the reserved biscuit crumbs for a little extra crunch!
Perfect for parties, afternoon treats, or sneaky freezer stash desserts.
Whether you're already a Biscoff addict or you've been looking for an excuse to try it, this Biscoff cheesecake recipe is a must-make. It’s creamy, crunchy, and just the right amount of fancy to impress guests (or, you know, just treat yourself after a long day of being mum).
Trust me, once you make them, you’ll never look at a plain cheesecake the same way again.
Like cheesecakes? Try my Red Velvet Cheesecake recipe!
Biscoff Cheesecake Bites
Equipment
- Food processor/ Thermomix
- silicone mini cupcake trays
Ingredients
- 250 g Biscoff biscuits keep two biscuits to the side for crumbs on top
- 90 g butter melted
- 250 g cream cheese room temp
- 2 tablespoon icing sugar
- 1 tablespoon Biscoff smooth spread do a very heaped tablespoon
- 100 ml thickened cream
- 3 tablespoon Biscoff spread melted
Instructions
- Process the biscuits in a food processor or thermomix and add melted butter. Mix to combine.
- Put a teaspoon of mixture in each muffin hole and push it down firmly.
- Combine your cream cheese, cream, icing sugar and biscoff and mix til smooth. Spoon the mixture on top of the biscuit base.
- Smooth the top of your cheesecakes with a knife.
- Melt three tablespoons of Biscoff in the microwave for about 30 seconds. Use a teaspoon and spoon it on top of the cheesecake mix.
- Put them in the fridge overnight or in the freezer for about 3 hours. I haven’t tried getting them out of the mould from the fridge so I recommend the freezer.


Sharyn McGuinness
The most delicious and easiest thing I've ever made. Thankyou so much for sharing
Maraya
oh yay! Thank you!!!
Shauni
Hi! I'll be making these asap!
How much icing sugar do I use for the filling?
Thanks! Shauni
Maraya
2 tablespoons. I just fixed it. Sorry!
Megan
Hi - recipe says combine creamed cheese, cream & icing sugar. Ingredients don't list icing sugar. How much icing sugar is needed?
Maraya
I've fixed it now. Sorry!
Cathy
The instructions at step 3 say to combine icing sugar with the cream cheese & cream, however there is no icing sugar listed in the ingredients. How much icing sugar should be used?
Maraya
sorry! 2 tablespoons! Fixing
Cathy
These were delicious & easy enough for my 12 year old daughter to make. I noticed there is no icing sugar listed in the ingredients. How much icing sugar do you suggest adding?
Maraya
sorry! 2 tablespoons! Fixing now
Ash
Where’s the icing sugar in the ingredients…..
Maraya
sorry! Will fix. 2 tablespoons
Maria
Is there meant to be icing sugar in this? How much please? Mentioned in step 3 but not in ingredients.
Maraya
ahh sorry yes there is! 2 tablespoons