
I've hated the laundry in my house ever since we build it. For 11 years now it's been a washing machine and a metal basin, with a dryer on the wall. I've had no real storage and it's been higgledy piggledy and annoying. So I finally decided to do something about it! I didn't have a lot of money so we decided to attempt a laundry makeover for under $3000. Here's how we did it...

Contents
Laundry makeover for under $3000
Before
Here's what the laundry looked like before. The design was terrible and I should have picked it up in the house plans bit building a house is overwhelming and you miss things.
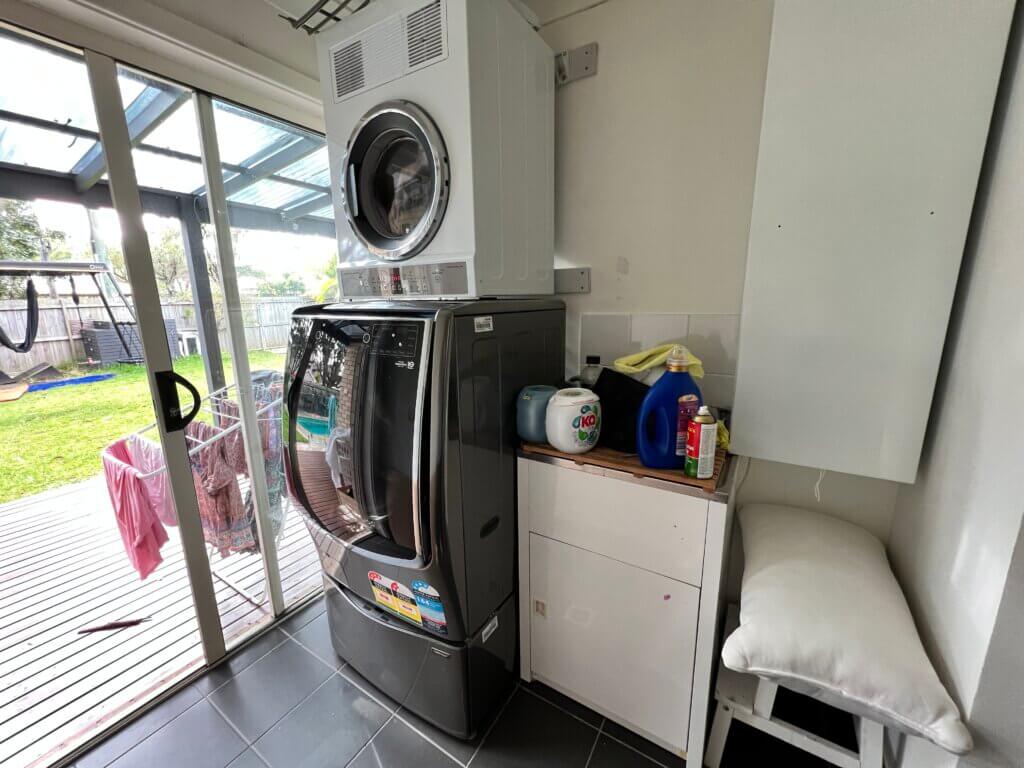
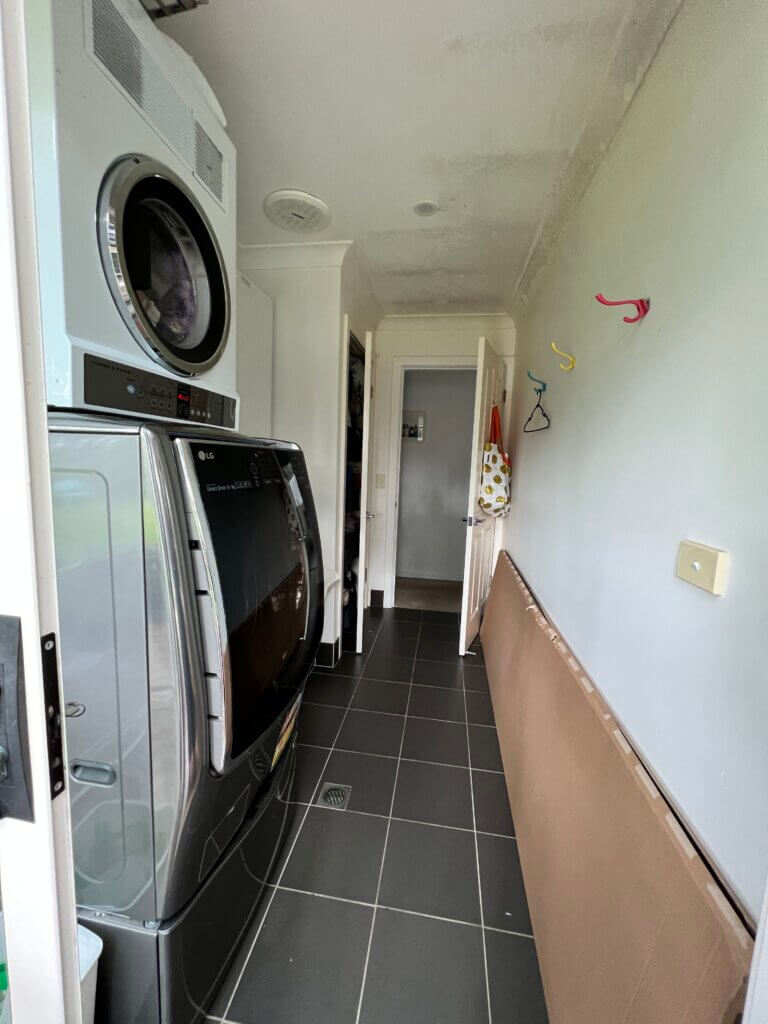
As you can see - it's completely non functional and a mess. Plus, the dryer was making the ceiling go mouldy all the time, even though we almost always haver the door open.
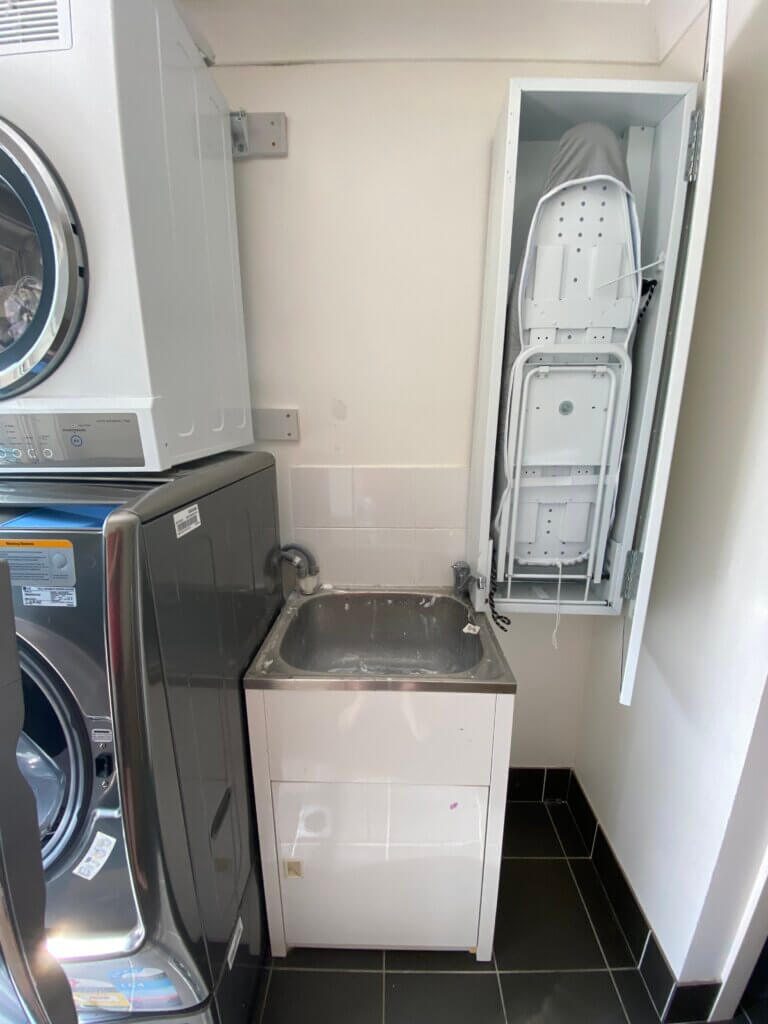
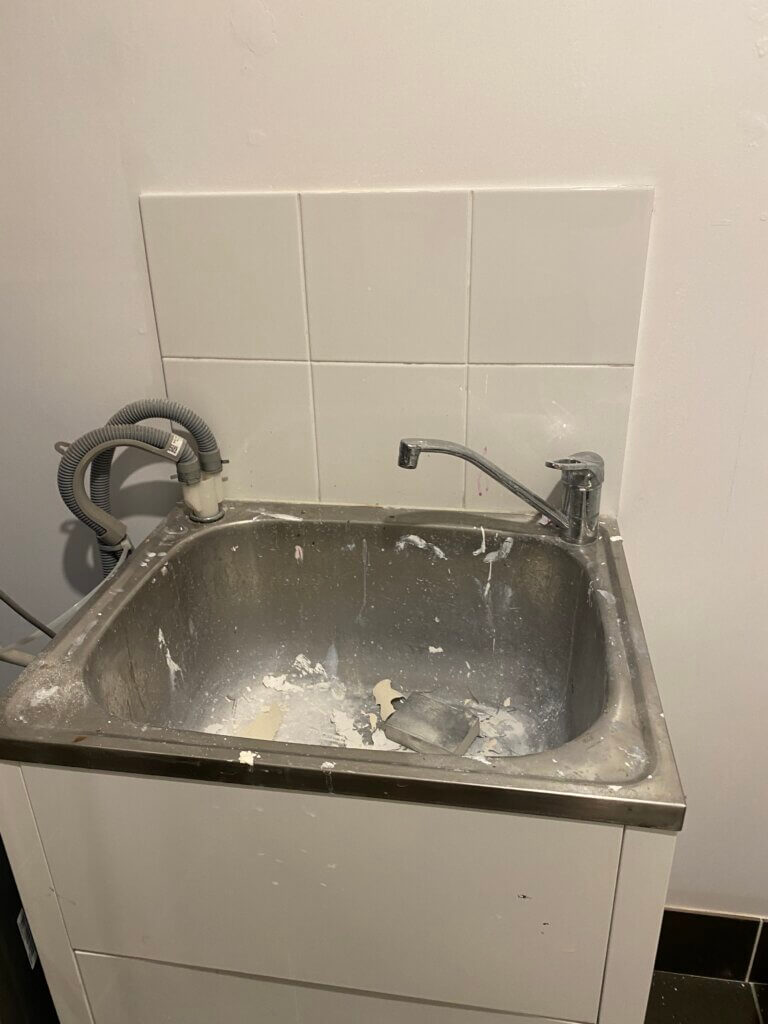
We never used the sink and we had it covered with a duckboard just to give us a tiny amount of bench space. So it was time to finally do something about it!
The Demolition
My husband took care of all the demo - pulling out the sink and removing the old tiles. If you have never removed tiles before (like us) you may not realise that they take the whole wall with them! So he then had to replace the gyprock on the wall.
He scrubbed the ceiling with clove oil to remove the mould and then scraped the ceiling paint, re primed it and painted it again. I wanted a feature wall to add some colour as I was going with white cabinets and a wood bench top. The colour I chose was Dulux Eucalyptus Leaf.
Demolition cost:
1L Dulux paint in Eucalyptus Leaf = $45
4L Dulux Wash and Wear bathrooms and kitchens paint in Vivid White = $104
Gyprock off cut = $5
Total= $154


The Build
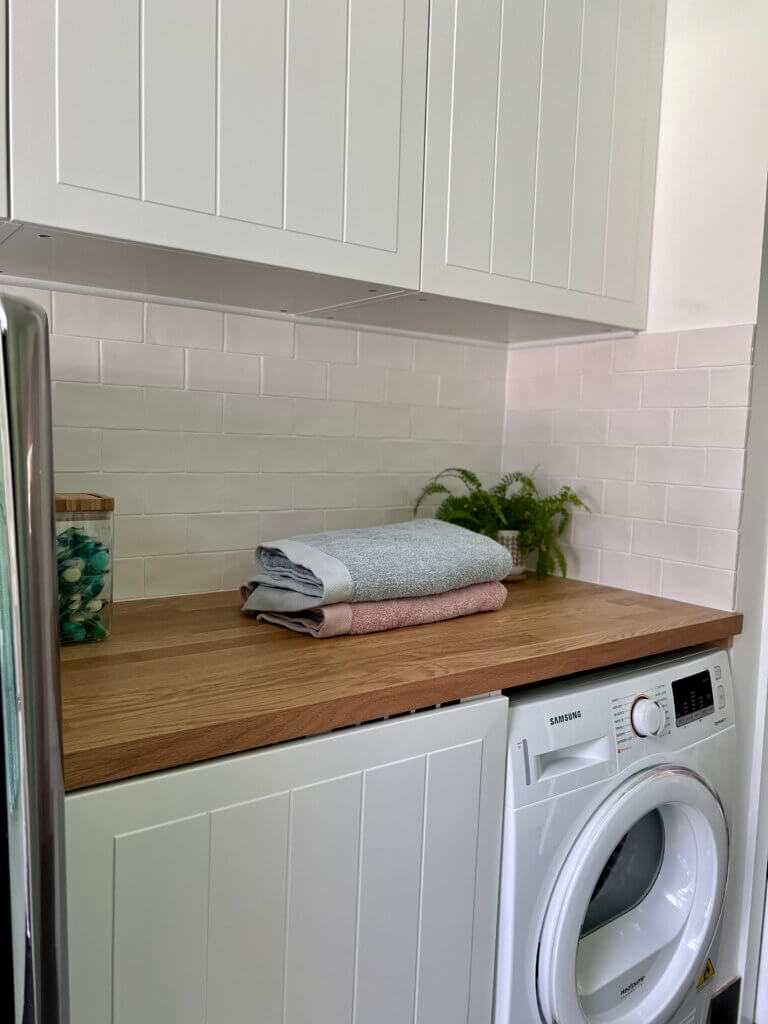
My vision was white cabinets and a wooden bench. I also wanted the new dryer on the floor. We were getting a heat pump one to reduce the mould and they can't hang. They can stack but not on top of the machine I currently have. If you are wondering what on earth that massive, industrial size washing machine is, it's a LG TwinWash and all the information about it is here. It's honestly the love of my life and the biggest conversation starter for anyone that visits our house. It can wash 12 towels at once. It's the best!
Anyway - back to the build. For budget purposes we chose cabinets and a bench top from IKEA. We went with the STENSUND cabinets and the KARLBY bench top.
NOTE: if you are buying wall hanging cabinets from Ikea you need to buy the suspension rail to hang them on. This comes separately! Same with feet and a kickboard for ground cabinets. We found out the hard way!
Building and Cabinet cost:
METOD wall cabinets x 3 = $440
METOD standing cabinet x 1 = $153
KARLBY bench top x 1 = $247
METOD suspension rail = $10
METOD legs = $10
Plinth = $10
Total = $865

The next expense was the dryer. It had to be a heat pump and they are a more expensive choice. I ended up getting a Samsung 8kg heat pump dryer for $930 from Appliances Online. I got it at 40% off on sale before Christmas.
Tiles
Next up was the tiles. I fell in love with these beautiful hand cut white subway tiles, made in Spain, from Naturally Tiles when I was helping my dad build a granny flat. So I knew that they were exactly what I wanted. I needed two boxes of them as I wanted to do the whole way across the wall. This is because eventually my industrial washing machine will die and then the plan is to get a below bench one and extend the bench across the whole wall. And I don't want to add tiles then.
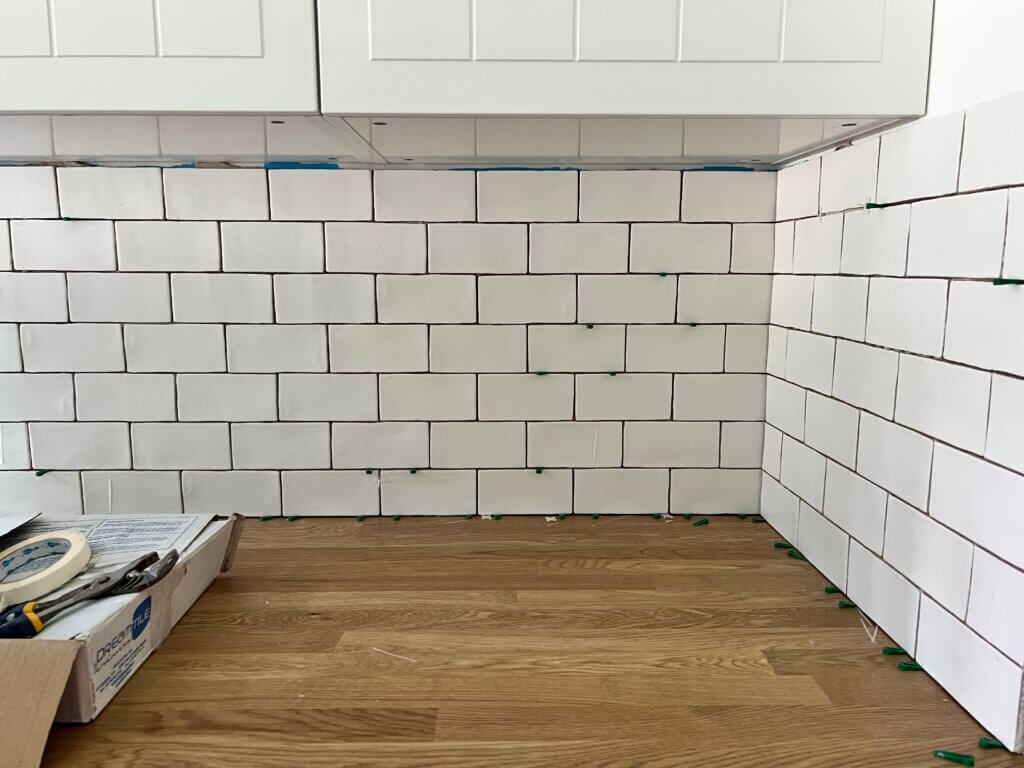
Tiling Cost:
2x boxes tiles = $160
Professional tiling = $680
Total = $840

Organising my new laundry
Once all the building work was done it was time to finally organise my new laundry! I am so excited to have so much storage. I'm obsessed with The Home Edit (Netflix) and I love how they organise using clear containers so they can see everything. With this in mind, I reached out to Howards Storage World to see if they wanted to help me out. They were excited to jump on board - so here's how I chose to organise everything.
Overhead cupboards
I'm 5.1 feet tall - I cant reach very high! So everything I needed to regularly access had to be on the lower shelves of the cupboards. The top shelves could keep all the cleaning stuff we rarely use but keep on hand just in case.
For the lowers cupboards I chose these SmartStore containers in medium. I love they are clear and light, and I can fit two on a shelf with space between.


For the top shelves I've used the same SmartStore containers in large. I can fit one on each top shelf and that's where I've stored all the products we don't use much.


In the bottom cabinet is one of my favourite new additions to the laundry! This little bin by Brabantia hooks on to a mount in the cupboard and it's perfect for all the lint we collect from the dryer. Then we just lift it off and tip it out. I love it! And I love the colour.


In that cupboard is also a step stool to reach everything up high!
You may have noticed we don't have a sink. Controversial decision but we decided (I decided) I would prefer the bench space. We never really used it before and the bathroom is across the hall. It's all plumbed in though underneath, so when we eventually extend the bench top, we will put one in then.
Hanging Space
Last, but definitely not least, is hanging space. Previously I had a few hooks on the wall for some things that cant go in the dryer and a drying rack outside for the rest. I have a washing line but I never use it. I forget the clothes are there! I prefer to use the dryer and hang some things.
My laundry is only small (under 2m wide) and I don't want anything in the way, so I chose this 1m wall mounted, retractable airer. I love how compact it folds up, but it also gives me 8.9m of drying space.


My total cost for my laundry upgrade worked out to be $2789, including my new dryer. This does't include the storage containers as they were kindly gifted to me by Howards Storage World.

I hope this laundry makeover for under $3000 inspires you to take on that room makeover you've been thinking of doing! Feel free to ask me any questions below.


Leave a Reply